Up, Up, and Away! A Comprehensive Guide on How to Make a Paper Airplane
A Fun and Easy Activity for Kids and Adults Alike
Are you tired of just folding a piece of paper and throwing it away? Do you want to create something that can fly high and far? Look no further! Making a paper airplane is a fun and easy activity that can be enjoyed by people of all ages. With a little practice and patience, you can create a paper airplane that flies smoothly and effortlessly. In this article, we will guide you through the process of making a paper airplane, covering the basics and advanced techniques.The History of Paper Airplanes
Paper airplanes have been around for centuries, with the first recorded use dating back to ancient China. The art of paper folding has been passed down through generations, with each culture adding its unique twist and creativity. From simple designs to complex ones, paper airplanes have become a popular hobby and entertainment for people all over the world.The Benefits of Making Paper Airplanes
Making paper airplanes is not only a fun and creative activity, but it also has several benefits. It can help improve fine motor skills, hand-eye coordination, and problem-solving skills. Additionally, it can be a great way to relieve stress and anxiety, as the focus on folding and creating can be meditative. Whether you're a kid or an adult, making paper airplanes can be a rewarding and enjoyable experience.The Basic Design of a Paper Airplane
Before we dive into the different designs and techniques, it's essential to understand the basic design of a paper airplane. A standard paper airplane consists of a rectangular piece of paper, typically with a length of 8-10 inches and a width of 3-4 inches. The paper is folded into a specific shape, with creases and folds that create the wings, tail, and nose of the plane.Step 1: Fold the Paper in Half
To start, fold the paper in half lengthwise, creating a crease in the middle. This will help you find the center of the paper and ensure that your folds are even.Step 2: Create the Wings
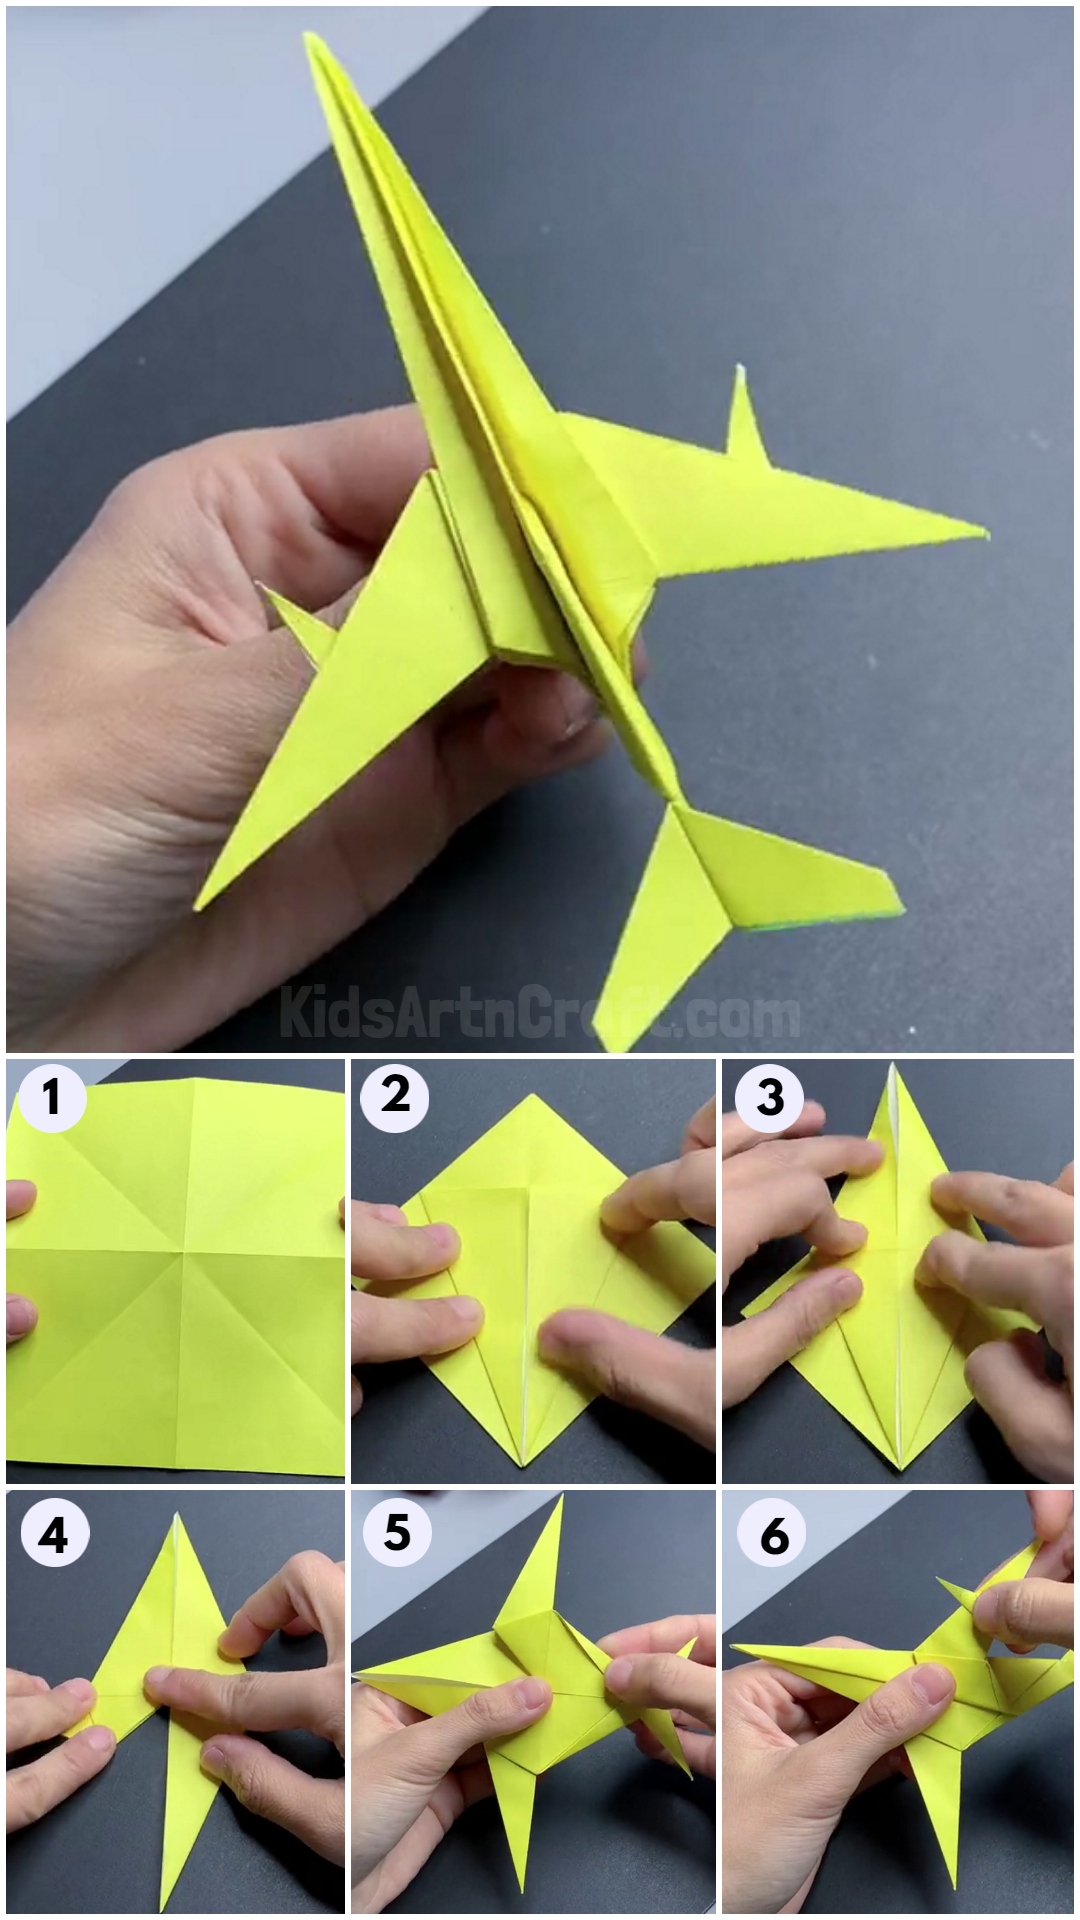
Step 3: Fold the Tail
Next, fold the bottom left and right corners up so that they meet the middle crease. Again, the folds should be symmetrical and about 1 inch deep.Step 4: Create the Nose
Fold the top edge of the paper down to create the nose of the plane. The fold should be about 0.5 inches deep.Step 5: Add the Finishing Touches
Gently pull the wings and tail down to create a smooth surface. You can also add a small fold to the nose to create a more defined shape.Advanced Techniques and Designs
Once you've mastered the basic design, you can experiment with different techniques and designs. Some popular advanced techniques include:- Cambered wings: Folding the wings at a slight angle to create a more curved shape.
- Raked wingtips: Folding the wingtips back slightly to create a more stable and efficient flight.
- Tail spoiler: Adding a small fold to the tail to create more stability and control.
- Ballast: Adding a small weight to the nose of the plane to create more stability and control.
- Gliders: Designs that rely on gravity and air resistance to stay aloft.
- Darts: Designs that are designed for speed and agility.
- Stunt planes: Designs that are designed for tricks and stunts.
- Long-distance planes: Designs that are designed for long-distance flights.


 - WeAreTeachers")


 Day")


")