Setting up a Twitch Channel for Gaming: A Comprehensive Guide
Twitch is a live streaming platform primarily focused on video game content, offering an exciting and dynamic experience for gamers and content creators alike. If you're interested in sharing your passion for gaming with the world, setting up a Twitch channel is the perfect starting point. In this article, we'll take you through every step of setting up a Twitch channel for gaming, from creating your account to customizing your channel settings.
What Is Twitch and Why Start a Gaming Channel?
Twitch is a community-driven platform where gamers can connect with like-minded individuals, engage in discussions, and share their gaming experiences. By setting up a Twitch channel, you can monetize your content, grow your audience, and build a loyal community around your brand. Whether you're an avid streamer, a casual gamer, or an aspiring content creator, setting up a Twitch channel is an excellent way to share your passion for gaming and connect with others who share your interests.
Choosing the Right Equipment
When it comes to setting up a Twitch channel, equipment plays a crucial role in ensuring high-quality streaming. While you don't need to break the bank to get started, investing in a good gaming PC, microphone, webcam, and streaming software will significantly improve the overall streaming experience. Some popular options for gaming PCs include the Dell Alienware, Razer Blade, and ASUS ROG. For microphones, consider popular options like the Blue Yeti, HyperX QuadCast, or the Razer Seiren.
Customizing Your Channel Settings
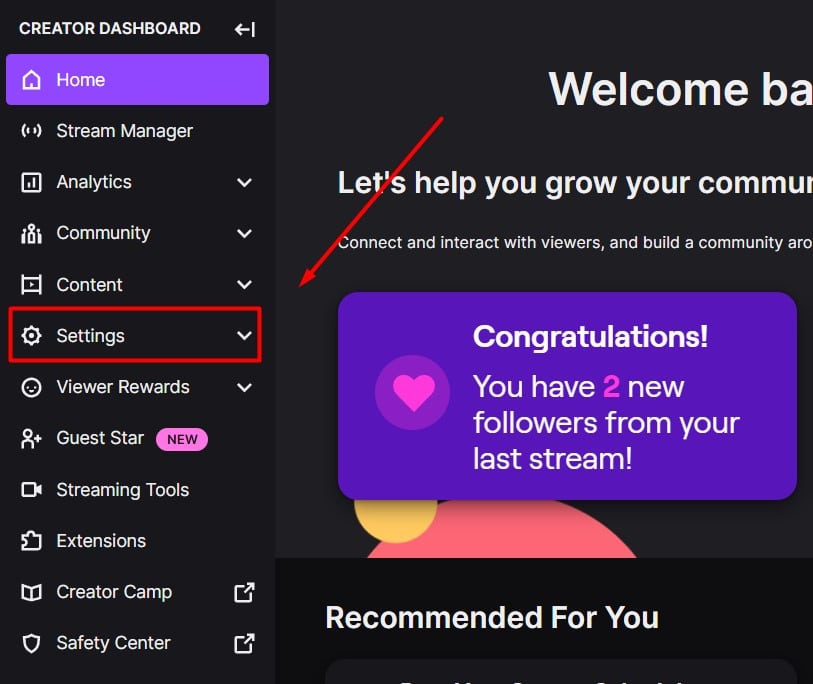
Once you've created your Twitch account and set up your equipment, it's time to customize your channel settings. This includes adding a profile picture, banner, and description to your channel. You'll also need to configure your channel settings to suit your streaming style. This includes setting up your streaming schedule, adjusting your stream quality, and configuring your chat settings.
Stream Overlay and Notifications
For a professional-looking channel, you'll need to set up a stream overlay and notifications. This will help viewers stay engaged with your stream, participate in interactions, and stay updated on important information. Popular options for stream overlays include Streamlabs, OBS Studio, and Scenes Pro.
Growing Your Audience and Monetizing Your Channel
Once you've set up your channel, it's time to grow your audience and monetize your channel. This includes networking with other streamers, promoting your channel on social media, and interacting with your viewers. You can also opt for affiliate marketing, sponsorships, or merchandise sales to monetize your channel.
Conclusion
Setting up a Twitch channel for gaming is a straightforward process that requires patience, dedication, and the right equipment. With these steps, you'll be well on your way to creating a professional-looking channel, growing your audience, and monetizing your content. Remember, networking, social media promotion, and working towards Affiliate or Partner status are key to taking your channel to the next level.
Recommended Equipment and Tools
- Good Gaming PC: Dell Alienware, Razer Blade, ASUS ROG
- Microphone: Blue Yeti, HyperX QuadCast, Razer Seiren
- Webcam: Logitech C920, Razer Kiyo, Elgato Cam Link 4K
- Streaming Software: OBS Studio, Streamlabs, XSplit
- Stream Overlay: Streamlabs, OBS Studio, Scenes Pro
- Notifications: Streamlabs, OBS Studio, Push')
Recommended Resources
- Twitch Official Help Center
- Streamlabs Official Website
- OBS Studio Official Website
- Razer Official Website
By following these steps and using the recommended equipment and tools, you'll be well on your way to setting up a successful Twitch channel for gaming. Happy streaming!


 - Go Live ...")


